Showing posts with label crafts. Show all posts

Monday, July 9, 2018

Week 2 Year 8

Computer is still refusing to cooperate, so this post was delayed.

I managed to get a few things done this week. Worked on one project off of the list and another that was an order for a friends store. 

I'll start with the order, these don't take that long to do but my crochet time was cut a bit short this week due to some travel and pumpkin seed planting.

These Diva Dishcloths will be sent out this week to Up Beet Market in Wilmington. It's a vegan speciality store but she is also buying from local crafters, mainly kids items and other household things that support the lifestyle. She's been open just over a month and sales have been great. I'm always excited when someone can follow their dreams! So 12 dishcloths can be added to my list for July.

I had made a set of play veggies for her and they've flown out the door. I knew they had been popular but I didn't realize she was almost out. I had worked on Mushroom this week.

Three of the four that I sent. I guess I should have done a few more.

This is the display after the four mushrooms were added! I'll be working on veggies the next few days I guess..

 I did manage to work on one of the items on my list. The Unicorn Ripple. These colors are so much brighter than the actual colors. It's really pastel in person. And why in the world did I think single crochet ripples would be fun? I'll be happy to see the last row on this project.


While I didn't make much progress on the list I did make some progress on the cold sheep this week


Intake 0
12 Dishcloths -1440 yards
Mushrooms- 10 yards total (guestimate)
=1450 yards out for week 1

I'm not counting the progress on the ripple, I guess I could if I weighed the skeins but since I had the yarn in my stash I'll just count the total once it's finished. Easier that way and it keeps me moving items out!

Thanks for stopping by! I'm hoping for more progress next week!


Tuesday, July 3, 2018

Week 1 Year 8 of a Year of Projects


So it looks like a new laptop will be in my future, it's conked out on my again this weekend. No warning, just poof, it turns off. I bought a battery the last time and it seemed to be fixed but no luck. So I'm a bit late again this week but I had to get the list up for year 8 week 1 of the Year of Projects.

I've had some finishes but I've had a lot of startitis too. So I've decided the best way to clear some of those bags that are hanging on my craft room door and to bust some of the stash too, I'm going to concentrate on working on some of the old outstanding projects I have literally hanging around.

I think this is a fairly good representation of the items. I did manage to finish up two last year and I'm hoping to see all of these this year. If I run across some others I'll add them to the list.

While I need to see the end of these, I know I have a hard time NOT starting something else. So I'm going to limit the new starts to one at a time and only if a project gets marked off of the list first. Hopefully I'll have some special orders or requests too.

Also I know me and I'll never be able to work on one project until it's done so I'll try to do a bit on each each week, or at least a few.. Thankfully it will help the cold sheep process too, since I have a majority of the yarn bought already for these projects!

Ya'll have to keep me on track, I am already thinking about what the new projects should be!

Sigh that quilt down there, yes the "jar quilt" the top is done and it was supposed to be a going to college gift, well she graduated in 2008.. The top is almost complete, she even brings it up every now and then, her birthday has passed for the year but maybe I should shoot for 2020, she'll be 30..lol

Year of Projects Year 8 July 2018-2019

This is the year of finally finishing projects...and I'm still working the cold sheep plan.

Current WIP- Crochet
Peach Blossom Blanket from this spring 2018
Bee Hive Blanket- Spring 2018
Unicorn Ripple- May 2018
Pom Pom Rug- April 2018
Wood Land Animal hats- November 2017
Whale Shark- Gift for E- from only a year ago
Carrot Snuggle sack- 75% done- Spring 2017
Flower Garden Blanket- Started 2016
Cardigan for Me -Started 2016
Sidewalk Blanket- started 2015

Current WIP in Cross Stitch
Moose Welcome Cross Stitch
Lizzy Kate- Be who you are
Log cabin Quilts
Lizzy Kate- Dog Lessons
Lizzy Kate- Cat Lessons

Sewing Projects WIP
Soot Pillows for E
Project bags
Animal applique pillows

Quilt Projects WIP
Jar Quilt for E-2005
Wolf Panel- quilt 2008
Log cabin panel- quilt 2006

Old Wool Projects -
Bags of Fleece- Wash/Process/Dye
Spin roving bought from Heelside Farms
Get the wheel out and do some spinning

Thanks for stopping by! We're just starting a new year so it's a great time to join the Year of Projects! You can find us here on Ravelry!

Tuesday, May 22, 2018

Americana Rag Wreath DIY


Summer is almost here and while it is time for all kinds of celebrations it is also time for remembrances too. This Americana Rag Wreath is a great way to show off your Patriotism from your front door! It's simple, fun and brings lots of charm to all of your outside (or inside) get togethers this summer.


What you'll need:
1 14 Inch Foam Wreath
3/4 a yard of 6 different fabrics* (Mine were 44 inches wide) 
*You can pick more or less depending on your design groupings, but take into account how the colors and patterns look together. Complementary colors are best, I went with a Star theme and added a few stripes to give it more interest.


Start by cutting the fabric into 1.5 inch strips 14 inches long. Strips can be wider or longer, but this is the size that worked best for me. I liked the fullness of the longer strips, and a 1.5 of a inch width made a substantial knot. 

Once you have all of your strips cut you'll start tying them on to your wreath, by sliding the strips  under the wreath and tie on top using a double knot.  I alternated colors randomly and the location of the knots for aesthetic purposes as well as the way it "filled in" the wreath.

As you are tying the strips on, be sure to push them together so that it gives it a bunched appearance and ensures that the wreath is completely covered.

You can trim the lengths to make them more uniform or leave them as they are. I snipped a couple that were a bit out of hand..
The back is just as pretty as the front! 
You can see how I pushed  the strips them together for a fuller look. 
You could also add a short piece of ribbon or wire for hanging.


 This a great summer craft, it is even kid friendly. 
This would work for any season or holiday with a corresponding fabric.

Thanks for stopping by and I wish you and your's a very happy Memorial Day and a wonderful Summer full of Crafts and Sunshine.

If you love this idea but just don't have the time to make one for your home, This wreath or a version of it is available in my Etsy Shop, Farm2Ewe.


Sunday, April 29, 2018

Week 44 Year of Project Post


Just a Quick check in for the Year of Projects,

I've finally gotten a couple of squares joined on the Peach Blossom Blanket. I'm doing the Celtic Lace join by Cypress Textiles. I was happy with the original squares and I was planning a Lacey boarder but this is even better. Here's some progress.

It's going to need a bit more blocking after this .. It's another 4 rounds to the original squares so it will be a bit bigger than I had originally planed but that's another plus too.

Made some progress on the rainbow ripple too
I think I have the repeats worked out to get the size I want hopefully I'll see a finish quickly.

It's been a busy week, spring is finally here so I've made a bit of Jam to celebrate..lol
I've also had a bunch of projects sitting around waiting for me to get around to them, one of them was a vintage bird feeder out of a sugar bowl that I had picked up at a thrift shop a couple of weeks ago.
The birds have enjoyed it and it's a nice addition to my patio garden. And I'm glad to move it into the done column.

I've also managed to put together a couple of "wreaths", one for my door and one for a friend. The one for my door was from a wooden frame I had been holding on to for a while.  A little paint and a bow and it's ready to go.

The second is for a friend, a rag wreath, I'll be making some more of these, it was actually fun and I love the way it looks. I think it would be a great add to my Etsy store. Just in time for the Holidays.

I'm hoping to have a bit more Crochet time in the next coupe of weeks. I fell off of my cold sheep wagon and picked up a couple of Lion Brand Mandala Baby Cakes at Walmart for 3.97. I had been seeing people posting that they were getting them even cheaper than that and I never go into Walmart, but I had to go by today so I ran into them so I caved. I've been really good so a small stumble isn't too bad. 

Monday is the last day of the A to Z Challenge and I've been ahead of the process this time. I've enjoyed it but I'm glad to see the end of it too. Plus I picked up way to many ideas! 

If you're interested in more posts from the Yopers check them out on Ravelry!


Sunday, April 22, 2018

Week 43 in the Year of Projects

This week has really flown by, this is always the crazy week of the month for me at work and being the end of the quarter makes it worse. Having said that I don't have much umpf left for crafting by the time I get home. But I did squeeze in a few things this weekend.

I had blocked my squares for my Peach Blossom blanket last week and I did about 40 variations on the layout and after many changes I think I've decided on a random layout. I tried squares, lines, and ended up with this..

I think I'm happy with it..lol
Then I knew I wanted to do a lacy border and I then I ran across Cypress Textiles Celtic Lace Join. It looked so perfect so and would add a few inches so now my blocks will look like this..
So I'm going to be needing some more yarn and it will take a bit longer than I had originally planned. It really gives it the extra elements I was looking for. Hopefully it won't take me as long to work out a boarder. I'm still going for lacy but with the other colors too.

I did manage to finally get my veggie's completed and a picture taken so that I could get it posted to my Etsy  Shop. I.m hoping to do a bit better about getting things posted on there this year, For some reason the listing is really hard for me mentally..lol
I also managed to get a few rows in on the rainbow baby ripple. Just stating the next color block.

I said I wasn't going to start another project until one gets done, BUT my brain was fuzzy with all of the posting and pictures so I went with a simple I don't have to think about it project, of which consists of granny squares and stripes. I'll have an update next week on that.

The A to Z Challenge is almost over and I've actually managed to stay ahead and I'm hoping to have all of the posts completed be early in the week. Now if I could just finish craft projects as quickly I'd be great!

Have a very crafty week! Be sure to check out the other Year of Project posts too!


Friday, April 20, 2018

Rags for Rugs


Rag- noun A piece of old cloth, especially something torn  from a larger piece.

Sheets, clothing and towels all wear out over time, like everything else, but should they be doomed to the dump. To hang around forever at a landfill, taking up space, just for a worn spot or a hole? Of course not! They can find a new life in your home with just a bit of time and ingenuity .

Rag rugs can be sewn, braided, woven, crocheted or worked like a latch hook for a fluffier style. The patterns, shapes and styles are limited only by your imagination. I'll give you some ideas on each kind and then the rest is up to you as to what will find it's way into your home.

Sewn Rag Rugs- The majority of this sort of rug is done with strips of cloth, sewn together to make large strips that are then rolled or coiled in a circle and then the coils are stitched to the coil next to it. This produces a round or oval shaped rug and by design is very sturdy and colorful. When deciding on this style rug you can either coil the strips of fabric, which would give you a thinner rug or you could coil the fabric over either cotton piping or a rope, which would make the rug a bit studier.
how to sew a fabric rug
The Ric Rac Blog has a great tutorial on sewn rugs, this one is done over a rope and doesn't require the strips to be sewn together before hand. 


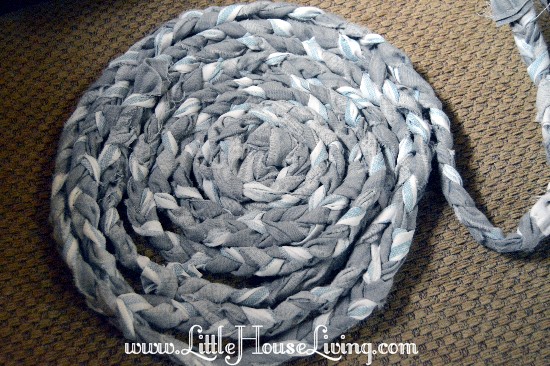
Braided Rugs- This is the same concept as a sewn or coiled rug except in the fact that the rug strips are braided into a long strip and then coiled. This enables the rug to have a bit more texture and is can be used in a higher traffic area, since they are a heavier option.
Marissa from Little House Living shows how to create your own Braided Rag Rug with a great how to on a very sturdy non sewn join.
How to Make Rag Rugs


Woven Rugs also use the sewn strip method but instead of a continuous roll the strips are a certain length.  Longer strips will be placed in the loom for the length and then shorter stips will be woven in an under /over pattern to join the lengthwise strips together.  Due to the weaving process these will generally be rectangular in shape but can have various thicknesses and textures depending on the processes used. You don't always have to have a loom to make a woven rug, check out Laura's option on A Beautiful Mess. She has taken weaving to a new but simple level and ends up with a truly neat project you can recreate in your home.
Make Your Own Woven Rag Rug abeautifulmess.com

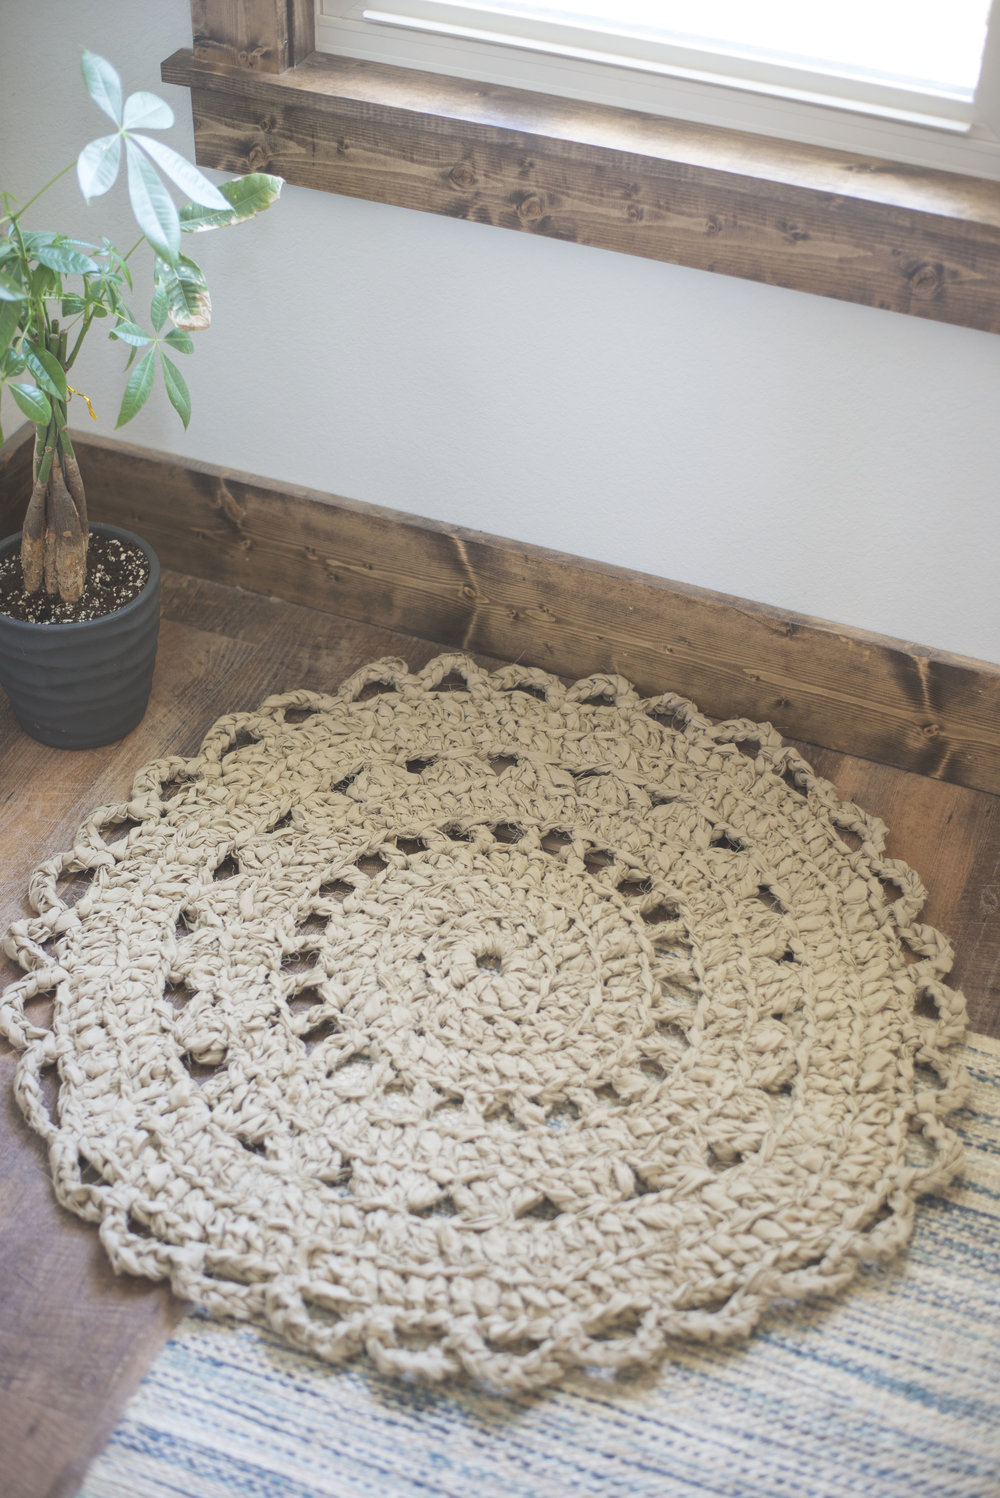
Crochet or knitted rugs, just like it sounds, strips of fabric are crocheted or knitted just like you would yarn. This enables the rug to take on many shapes or patterns. Often used for more artful pieces.
Not what you typically think of when you think rag rug! Instructions for this version can be found on 
She used sheets and gives all the details on how to create one yourself!

Latch hook fabric rugs are a lot like the latch hook kits so popular in years gone by. They use a backing and small strips of fabric which are left open on the top to give the rug a fluffy appearance. I would imagine this would be appropriate for a bedroom or a less traveled area but what a cute idea! As with all rag rugs the colors are very customizable.
 Jamie At Everyday Art created this rag rug for her daughters and has a very detailed and easy to follow instructions on her blog. These remind me of the shag carpet I had as a child! Ugg that might be giving away my age!


Rag rugs can be made out of most kinds of fabrics, sheets, or even denim. Don't have any extra scraps, shirts or jeans laying around? Check out goodwill, they normally have big bins of linens in all colors and at very good prices. You'll often put more time than money into a rag rug, but when you're keeping the materials out of the landfill that's a bonus.Then add the fact that you'll end up with a creation of your very own style, that makes it all worthwhile!

Thanks for playing along with me in the A to Z Challenge, there is a large group of very talented people who are also blogging the alphabet this month and you should check them out too. There are daily letter lists and the original list that can be stored by content or by theme. But whatever you do please be sure to check back tomorrow for my next installment, which includes a travel item being upcycled for your home.


Sunday, April 15, 2018

Week 42 Year of Projects

Here's my year of project post and it's a short one. Not that I haven't been doing a lot of Blogging, since I'm still hanging in there with the A to Z Challenge.

I've done a small amount of work on my rainbow chevron almost done with the first section of white.

All 30 squares of the peach blossom blanket are complete and blocking. I'll be working on layout early this week, hopefully.
I've got to figure out exactly how I want to join and a border so hopefully I'll see the end of this one soon. I just have too many ideas and options so I imagine that there will be many variations before I figure it out. 

The weather has been wonderful, sunny, dry and warm. With the crazy ups and downs we've had lately I haven't started a bigger garden yet but I couldn't resist getting something started. 
I planted these tomato and basil plants last weekend and they have taken off. They are planted in a old Chicken feeder that I picked up at an auction last year. I'm hoping to add some thyme to the bottom round portion. I have another that I did today with some lemon balm and sage. I finished the little addition this weekend too. I thought I would add him to give them some encouragement..lol

This afternoon I finished up a few more hats for Babba's Angel Gowns, This week it's a Angel pins and medium and large hats. I managed to use complete quite a few hats today and I'll hopefully get the end weaved in and ready to mail before too much later. They are calling for ugly storms so I'm staying up a bit later to see what the weather brings. 

So it's been a pretty good week for cold sheep, these hats were a whole skein and then I've managed to stay out of the yarn section too. So that's a plus. 

I'm hoping for a bit more production this week, we'll see how it goes.

Hoping everyone has a very crafty week!


Wednesday, April 11, 2018

Upcycling Jars for J in the A to Z Challenge


As a Canner I use jars for everything, especially since I always have them hanging around. And I do like to store in glass instead of plastic so that's a bonus. But what do you do with all of those jars that aren't canning jars, put them in the recycling bin? Well that's one thing but how about prettying them up and using them all around the house.

It doesn't matter if  you have big jars or small jars, decorative jars or simple pickle jars there is an idea for it.  Scroll down to see how others are saving money and adding storage and interest to their spaces. And what's even better these don't generally need more than some basic tools, paint and  a glue gun.

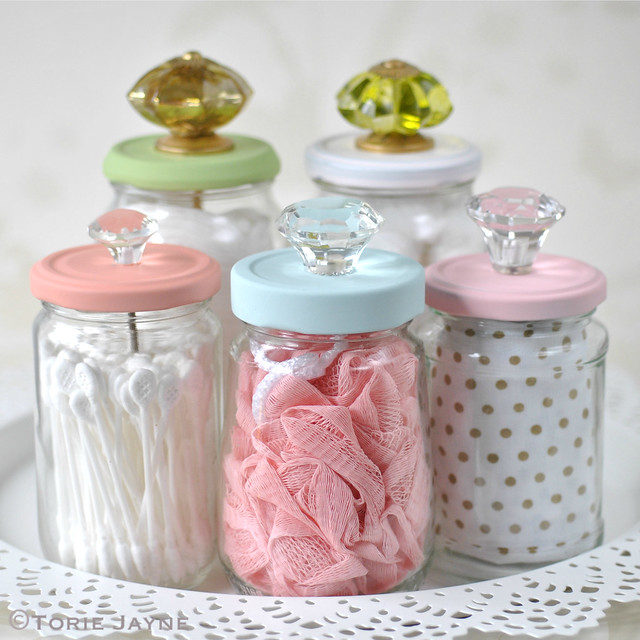
 While a jar is a jar, and it's made for storing something not much you can do about that, the easiest change you can make is with the lids. Adding a knob, finial or even a little plastic animal can turn plain into chic.


Children's storage jars with plastic animals on lids Upcycled glass jars with knobs
Ideal Home                                                                                      Torie Jayne

A little paint can go a long way towards creating something new out of something old

These DIY candle holders are easy to make and pretty enough for gift giving. The dotting technique is very forgiving, too.
Create Craft Love                           Attainable Sustainable


With a small amount of effort you can go all out and create something truly remarkable
How about Apothecary Jars, they can be very expensive but are the rage for all kinds of decor

Say Not Sweet Anne  used jars, bowls and candle sticks to get this great arrangement. I don;t know how many if these items I've seen at yard sales and auctions for very little money.

Love the idea but want a little less Bling- Check out A Diamond in the Stuff version
Candle Sticks, Mason Jars and a Finial- Add a little paint and glue and a bit of nature for inspiration

And last but not least if you are really handy or want a bigger project, try your hand a lighting

You can start with Candles, Luminaries are a great idea, fill the bottom of the jar with your decor of choice, sand, pebbles, stones or marbles, then add your candle. they can be hung, placed on shelves or just set along a path.

diy mason jar lanterns
Rae posted this tutorial over on A Southern Fairy Tale

Then you can work up to LED or solar lights also as luminaries or as outdoor lighting

DIY Mason Jar Light
Fairy Twinkle Lights? Lightn' Bugs? I'll take them!
Thanks to All Things Heart to Home for this idea

Are you feeling you want a bit more? Here are two ideas for Chandeliers, one is on the simpler side and the other will require a bit of electrical know how.

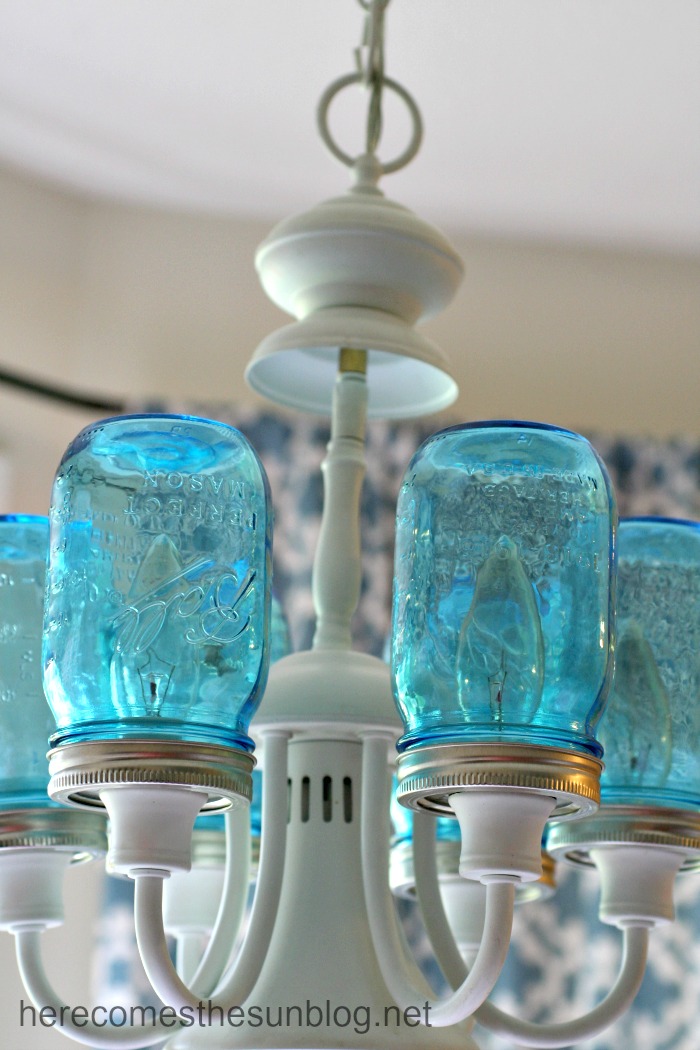
Mason Jar Chandelier
Here Comes the Sun took an existing light and just added jars. Love the new colored jars Ball is coming out with, look for these blue, green and even purple jars.

IkeaHackers took some everyday items and made some eye catching lighting for the kitchen!
This one used premade light cords but there is a bit of electrical work in tying it all together.


No matter your level of craftiness, there is a jar project just waiting for you! Have you upcycled some jars, used them for storage or just for display? Le me know how it went!

Thanks for stopping by and be sure to check out all of the other bloggers who are doing the A to Z Challenge this April!

Tomorrow my K got started in the Kitchen but it can't be contained! I'll see you tomorrow for more ideas...

Thursday, April 5, 2018

End Tables for the E - Day Five of the A to Z Challenge


Welcome Back! Today is the day for End Tables for my E. This project could be a bit easier to find materials for, you might even have one in your living room or garage that's just been hanging around waiting for either a new idea or trash day. Well don't throw it out, recreate it!

Today I'll talk about three different ideas for three different kinds of tables. One for your fur babies, one for a seating project and one for the little non furry kids in your life.

Let's start with a lego project table, it might just save you from stepping on these instruments of torture in the middle of the night. Check out this great idea and how to from The Salvaged Boutique.
lego table top view


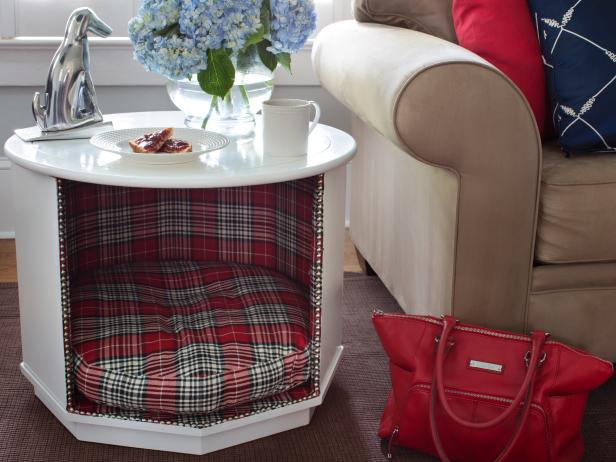
Now on to an end table from the 70's, My mom still has a couple of these hanging around, and I bet you know someone that does too. Those crazy octogonal tables with the slate or solid wood tops, make a great hideaway spot for your furry friends. The DIY network has a great tutorial on helping your end table do double duty and get a update at the same time.
CI-Brian-Flynn_End-Table-With-Dog-Bed-Empty_s4x3
Who wouldn't want to add this to their living room? Get easy to follow instructions here

And last but not least how about adding some seating without a lot of effort.  After all it's the right height and they are fairly easy to find. You could use the same style  of table that was used for the lego table upgrade, now it's a gossip bench! Always wanted an antique gossip bench well now you can make your own with some instruction from Art is Beauty They used an existing bench but you could just cut it down and add the cushion and there you go!  


And that's it for day 5 of the A to Z Challenge. I'm so glad you're here hopping along with me. Be sure to check out more the great blogs participating this April 1-30. F is our next letter, check back on Friday to see what I'll find..

Sunday, April 1, 2018

A to Z Challenge - Let's start with A


It's April 1st also known as April Fools Day but I'm not fooling around this year!
Normally this spot is reserved for my Year of Projects posts, but I'm doing double duty today, It's also the first day of the A to Z Blogging Challenge. If you haven't heard about it, then stay tuned!
A group of us crazy bloggers have each picked a topic and we'll be posting every day of the month except for Sunday, this post not included, with a letter of the alphabet.

I chose for my theme- Upcycling Crafts for you and your home! You've heard that everything old is new again and reuse and recycle. How about this one, repurpose or upcycling? I'll be talking all month about doing just that. With small things and large things, and I hope you check back each day to see what else I've managed to dig up for you. You never know you might just find something awesome for yourself!

So let's start with A for Armoire. They are not just for clothes anymore!
If you're like me you can't pass up a yard sale, flea market or a thrift store, you never know what you'll find!
Image may contain: indoorImage may contain: indoor
Goldsboro Habitat Restore

These are two from my local Habitat, both great shape and great pricing. Which of course were both gone by the time I got there.. I'm not the only one with ideas it seems.

So now you have an idea of what we're talking about and where to pick on up, now for ideas on how to transform them into something else for your home.

Have a small space but need a dedicated office or crafting space?
Check these out!
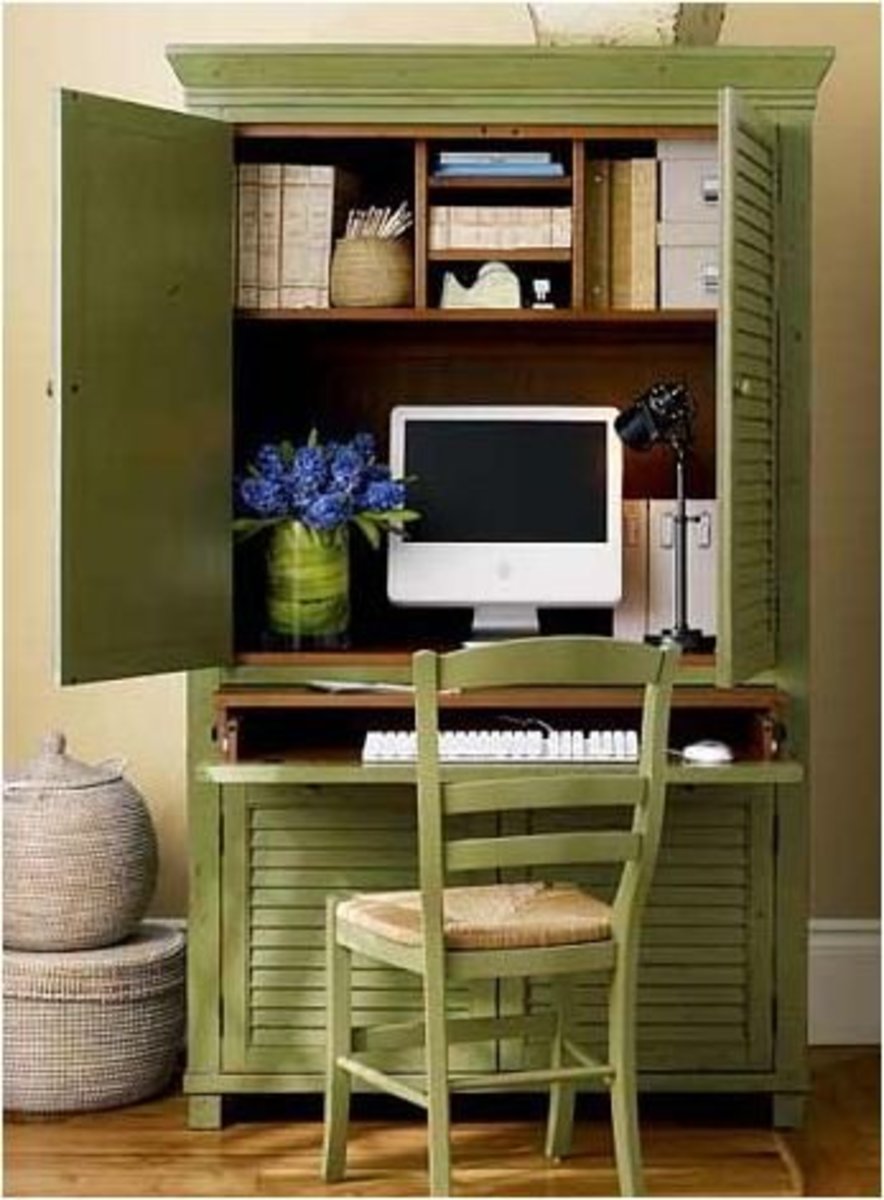

As an office- Hub Pages


or as a sewing craft station - Girl In Pink

You are only limited by your imagination!
Use them in your Kitchen as a Pantry

How cute is this! Yes Please! From Tidy Brown Wren

or as your Kitchen! For those wide open floor plans. tiny studios or workshops

This is premade by Culshaw but with a little work you could create a version of this yourself!

Older furniture was made out of solid wood unlike a lot of the newer components, that just don't stand the test of time. Here are a few things to think about when you are out searching for that just right piece.

Is the piece solid wood? You don't want to work with pressboard or chip board, they just won't hold up.
Does it need a lot of repairs? Know your comfort level and stick to it. Definitely don't be afraid to try new ideas but if it's falling apart and you don't have the tools to do the repairs don't get in too deep.

Know the age of what you've found, don't refinish something that is truly old and would be worth more if kept in it's original state. Solid wood backing and hand cut dove tail drawers are one thing to look for, these are usually expensive but if you find something in a barn for really cheap that looks really old have it checked out before you start painting it!

In my grandparents day all they had was solid wood furniture and some of it was even made by family members, after we've spent 30 or so years using nothing but pressboard and plastic we realize that they may have been on to something. People are interested again in these items that have held up to the test of time so well, they are refinishing and repurposing them for new things that fit our busy lives.

So be sure to stop at that local flea market or thrift store, take a walk around you might might find exactly what you were looking for. It's fun and better than buying from the big box stores. You don't have the space or time to do it yourself, check out those same sells for prefinished items too. Support local handmade, even if it has been made over a couple of times!
Thanks for stopping by and happy hunting! Monday's letter is of course B and I'll be talking about something a bit smaller..check back to see what it is!

Also be sure to check out other bloggers who are doing the A to Z Challenge in April!
Do you have an idea or have you done a bit up of upcycling? Let me know in the comments below, I'd love to hear from you and see your projects!